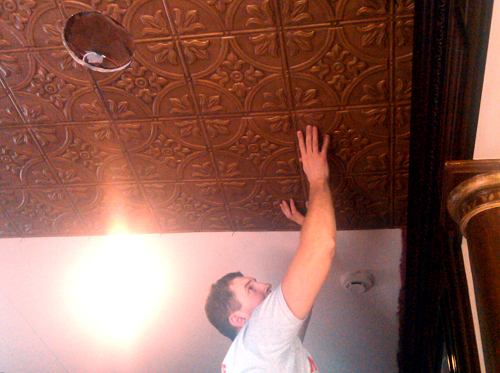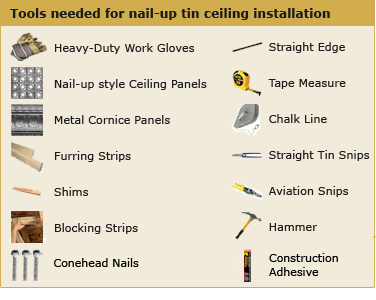
Ensure that your hands are well-protected while you are handling metal ceiling tiles. The edges of these tiles are very sharp!
* If you are using construction adhesive or glue, skip steps 2, 3, and 4. Even when using glue, Tin Ceiling Xpress recommends using nails or screws for this shims.
Nail-up style tin ceilings must be affixed to a soft wood substrate. There are two options to provide this substrate. The easiest way is to cover your entire ceiling with sheets of â…œ” or ½” plywood. Traditionally, tin ceilings are installed using furring strips. Continue reading if you plan to use furring strips. Jump to step 5 if you choose to use plywood.
To install your new tin ceiling using furring strips, build a grid pattern using 1” x 2” or 1” x 3” strips. Check the bottom of the ceiling joists for any bows along its surface by holding a straight edge to the bottom of the joist. If there is any variation, you will need to compensate for it later.
The first furring strips should be installed around the perimeter of the room, according to the cornice dimensions on the center of the strips. Draw a chalk line to serve as a reference. After the furring strips have been installed around the perimeter, attach the remaining strips to the ceiling from its center radiating outward. The furring strips should be run perpendicular to ceiling joists at 12” intervals across the room.
With all of your furring strips in place, it is time to ensure that they are level. Use a piece of string to test this by creating a loop at either end of the string, then hang the loops on two nails place opposite to each other across the room. Ideally, the boards and the string should be even along the entire length of the room.
If any gaps appear between the string and the board, you will need to bring the furring strip down so that it is level with the string. This can be accomplished by inserting shims (wedge-shaped pieces of wood) between the furring strips and the ceiling to raise low areas.
Once the furring strips are installed and level, it is time to add blocking strips. They should run cross-wise between the furring strips at 2 foot intervals to provide you with a nailing surface on all four sides of each 2’x2’ panel.
Tin ceiling tiles are best installed from the center, radiating outward. To find the center of your ceiling, stretch a chalk line between the two sets of opposite corners of the room. The lines will intersect at the center of the ceiling. Next, stretch two lines through this center point so each is parallel to one pair of walls. These lines will be your baselines.
In a flawless tin ceiling installation, the layout is balanced in such a way that the panels touching one wall are the same size as the panels touching the opposite wall. Figure out how many tiles will fit along the baselines, taking care to account for overlap (usually â…œ”), and plan to install your tin ceiling accordingly.
USE HEAVY-DUTY WORK GLOVES FROM THIS POINT ONWARD
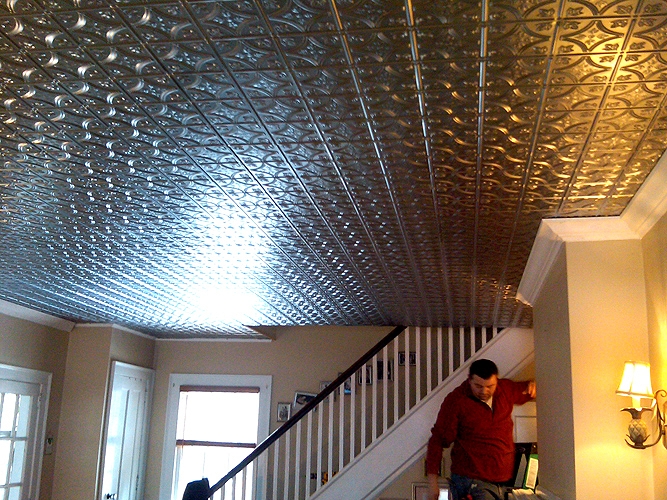
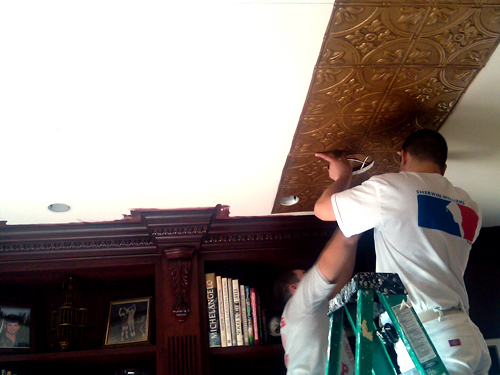
Tin ceiling panels are sharp, so take care to avoid injury from their edges. Start installing tiles from the center of the room, and work outward from there. Take care to alight each panel with its neighbor and allow their edges to overlap. Drive decorative conehead nails in ever 6 inches and they will become part of the overall pattern.
The only tools necessary for cutting and shaping tin ceiling panels are a pair of straight tin snips and a pair of aviation strips designed to cut curves. These are particularly useful when cutting around obstacles such as an overhead light box, or cutting miters.
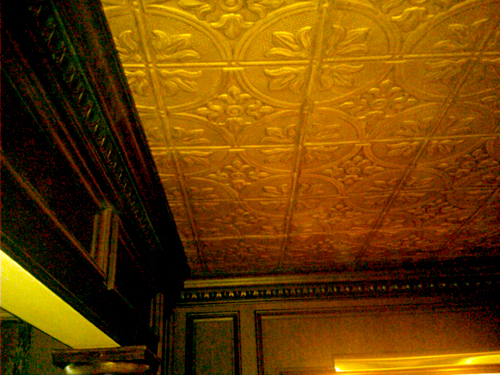
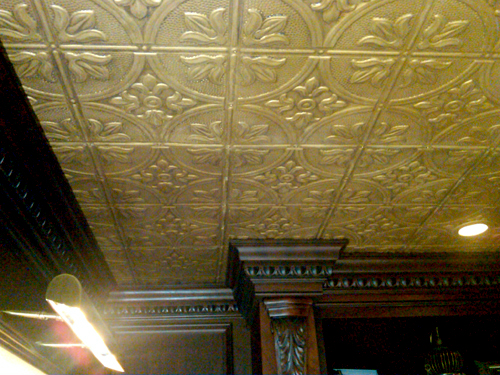
After your tin ceiling is installed, you will need to install a cornice to cover the gaps along its edges to provide for a seamless finished product. The cornice can be installed by nailing it into the ceiling through the ceiling panels and into the wall at 6” intervals. When purchasing cornices, take note of their measurements. The projection of the cornice is a measurement of how far it will extend across the ceiling. The depth of the cornice is a measure of how far it will extend down the wall.
The inside corners can be easily shaped using a pair of snips. Trim the first piece of cornice to length with a straight cut and slip it into place. Then, cut the second pieced on an angle with a notched edge (hold the two cornices against each other and trace to scribe this curve). The angled section will slip over the first, and the notches cut will help to blend the corners.
If you need to cut any outside corners of your cornice, miters can be cut using aviation snips. Hold the two strips of cornice as they will meet on the ceiling and scribe the curved edge on each piece. Score the piece to be installed second by cutting â…›” snips into the metal. To blend the cut edges, first tap the edges gently with a hammer and then use the head of a nail to blend, or caulk, the seam.
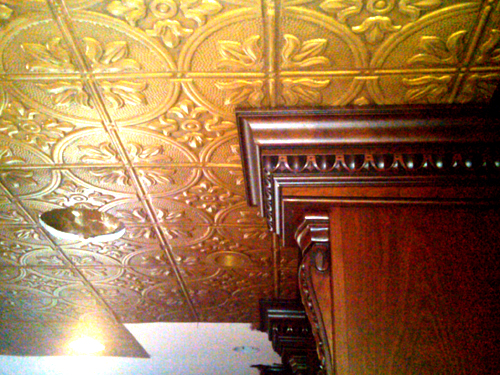
Any steel material should be coated with an oil-based product for protection and best results. Tin ceiling tiles and cornices can be purchased from Tin Ceiling Xpress in a wide variety of professionally pre-finished styles (browse our catalog of finishes here).
If you decide to paint your new metal ceiling, be sure to use an oil-based primer and paint as water-based products will cause the steel to rust. Unfinished steel must be cleaned with wax and grease cleaner prior to painting. Neither our white nor our pre-finished panels need to be cleaned. Take care not to scratch pre-finished tiles when nailing up the ceiling. Our vintage hand painted finished tiles have thicker coatings as well as a texture which effectively conceals any scratches or dings.
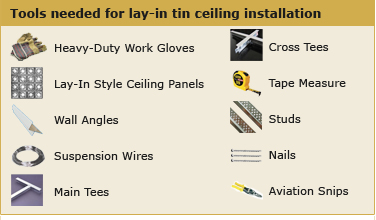
Obtain the exact measurements of the room in which you are installing your new tin ceiling (a tape measure can be used for this). Using a piece of graph paper, plot out the precise dimensions of the room. All tin ceiling tiles from Tin Ceiling Xpress measure 2’ x 2’, making it easy to plot out how many tin tiles you will need to purchase in order to cover your ceiling. Be sure to purchase a small amount more tile than you will actually need, to account for any installation difficulties.
Use a level to draw a line around the room. The line should be perfectly parallel to the floor and should be drawn at least 3” or 4” below the room’s existing ceiling to allow for proper clearance.
Taking your time, attach the wall angles to the wall by nailing them to studs. Ensure that the bottom flange of each wall angle rests on the line you have drawn around the room’s perimeter.
Stretch a tight line from the top of the wall angle at each position where you plan to install the main tees. Trim your suspension wires to the proper length, ensuring they are 12” longer than the distance between the old ceiling and the string you stretched to indicate the main tees. Install the first suspension wire for each main tee immediately above where the first cross tee meets the main tee. Fasten the suspension wires to the ceiling using screw hooks or nails.
In this manner, install a suspension wire every 4’. Be sure to stretch each wire to eliminate kinks and make a 90 degree bend where the suspension wire meets the level line.
Determine the distance between the wall and the first cross tee. Measure this distance long the main tee’s top flange and find the slot immediately beyond this point. From here, measure back the same distance, subtract â…›” to account for the thickness of the wall angle, and use a saw to cut the main tee at this point.
In this manner, install the main tees to be level with the wall angles already installed
Push the ends of the cross tees into the slots of the main tees to install them into your developing grid. Install the cross tees every 2’ to account for the measurements of the tin ceiling tiles you are installing.
Install your new drop ceiling by lifting each tile into the lay in grid, aligning them, and allowing them to fall into place.